
Common BTS4000 models include the 5V100mA, 5V6A, and 5V12A testers, all featuring similar hardware connections and identical software setup. A single Pro version controller can connect up to 10 testers in one rack. Here’s a quick guide on BTS4000 set up.
Recommended computer configuration:
- CPU processor is I5 or above
- Memory capacity is greater than or equal to 8GB
- Hard disk space is not less than 1TB
- Recommended computer operating system: win7, 10, 11 (64-bit).
- If you’re setting up a new computer that requires memory partitioning, ensure the software installation disk (separate from the system disk) has at least 400GB of available space.
1. Hardware connection
1.1 Power cable connection
For 5V100mA and 5V6A testers:
Plug in the power cords at the back of the testers and controller.
For a rack of 10 testers:
Use the cord with 6 pins, connect 1 controller and 5 tester.
Use the cord with 5 pins, connect 5 testers.
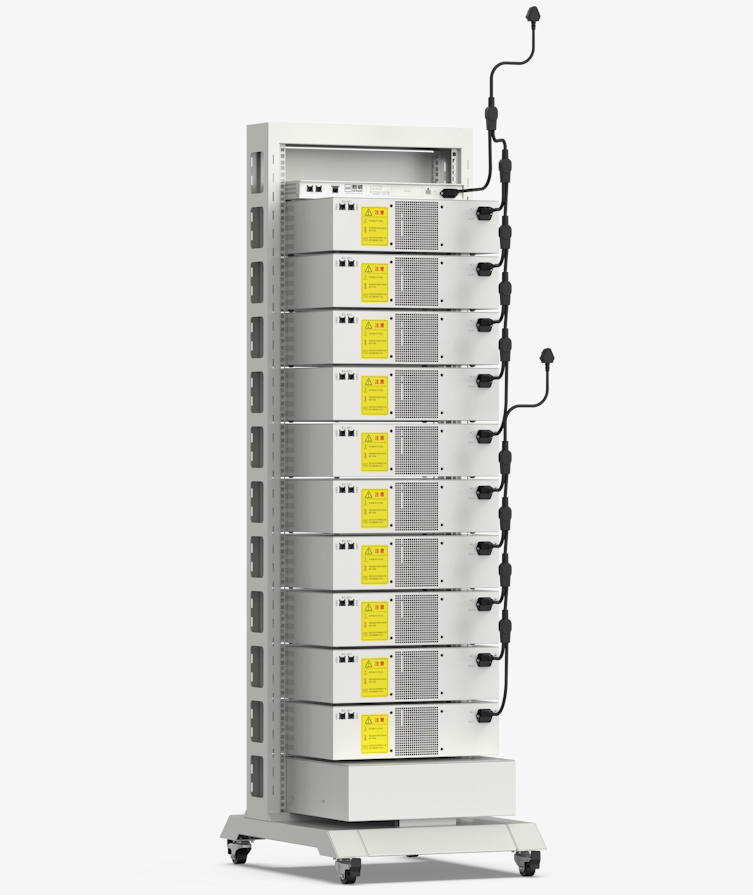
For 5V12A/20A/30A testers rack:
Plug each power cord into the back of the rack.
The tester’s power cords have a power input of 220V or 110V single phase.
The full rack has a power input of 380V or 208V 3phase.
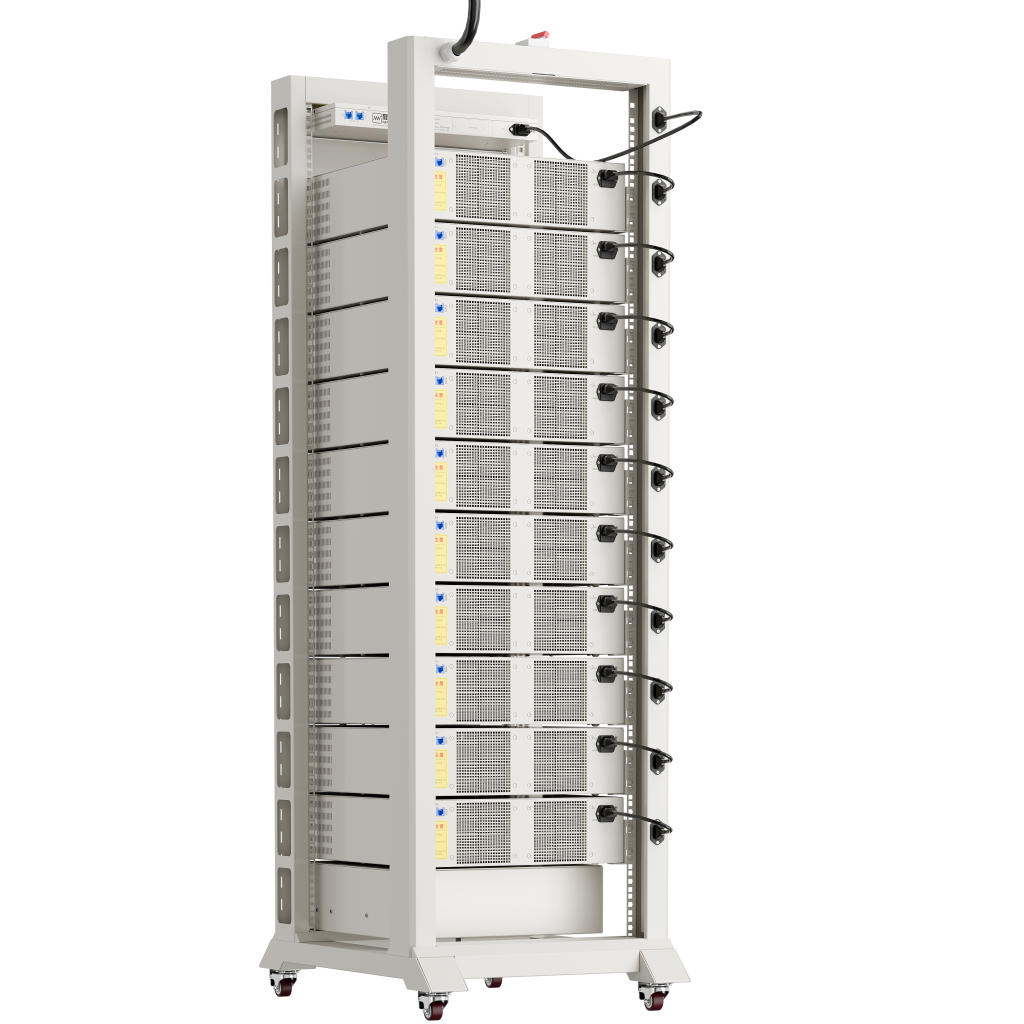
1.2 Ethernet wire connection
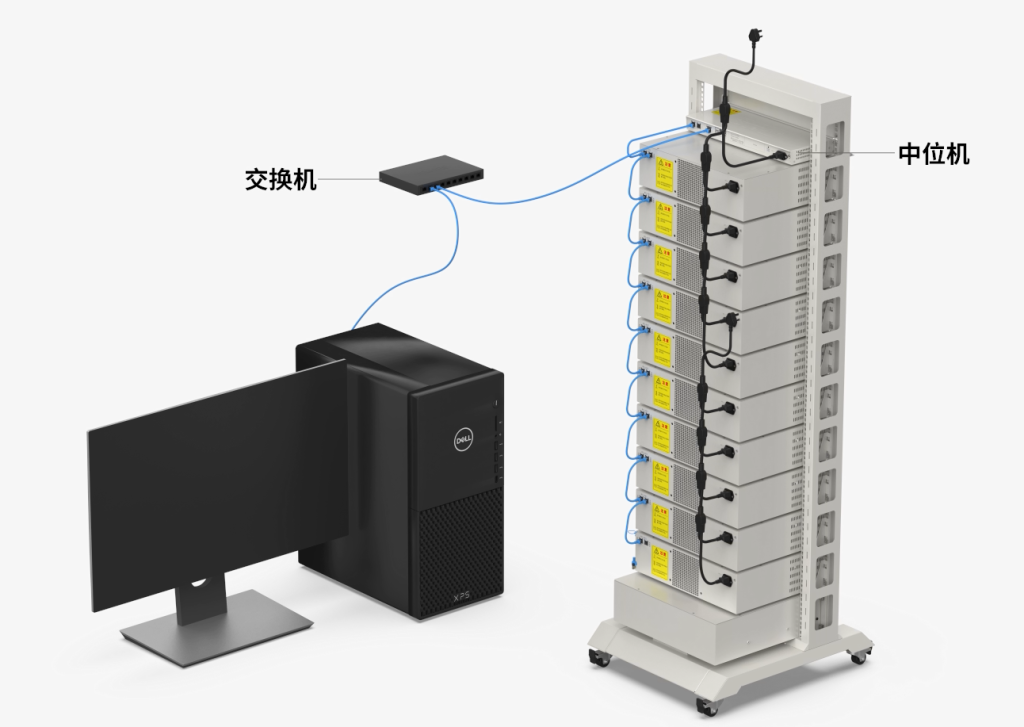
Connect the controller unit and testers one by one using ethernet wire at the RS-485 port.
Connect the controller unit and computer using ethernet wire at the TCP/IP port.
With multiple controllers, use an ethernet switch to reach each controller, then connect to the computer.
2. Controller unit setting
2.1 Set the configuration to 【Manual】
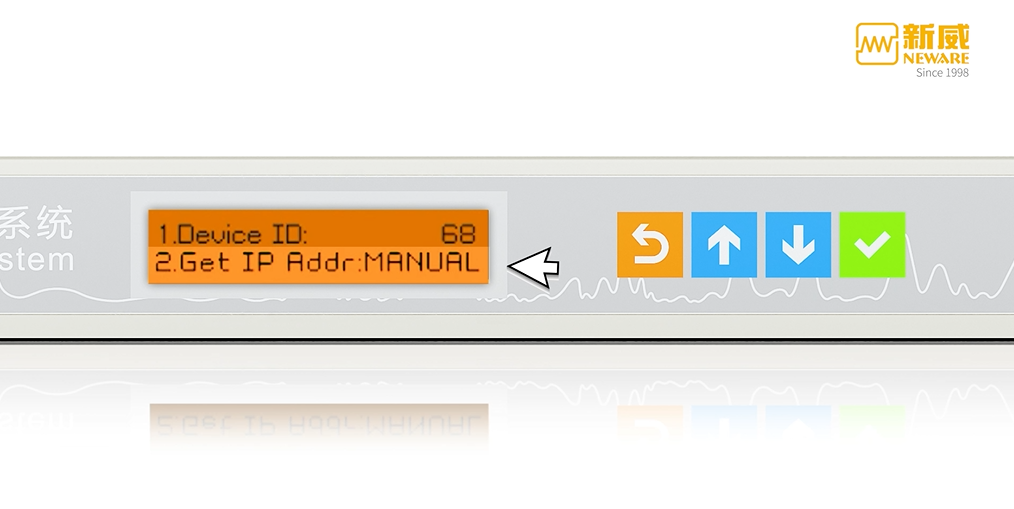
Go to line 2 【Configuration】and set it to【Manual】.
2.2 Check IP addresses
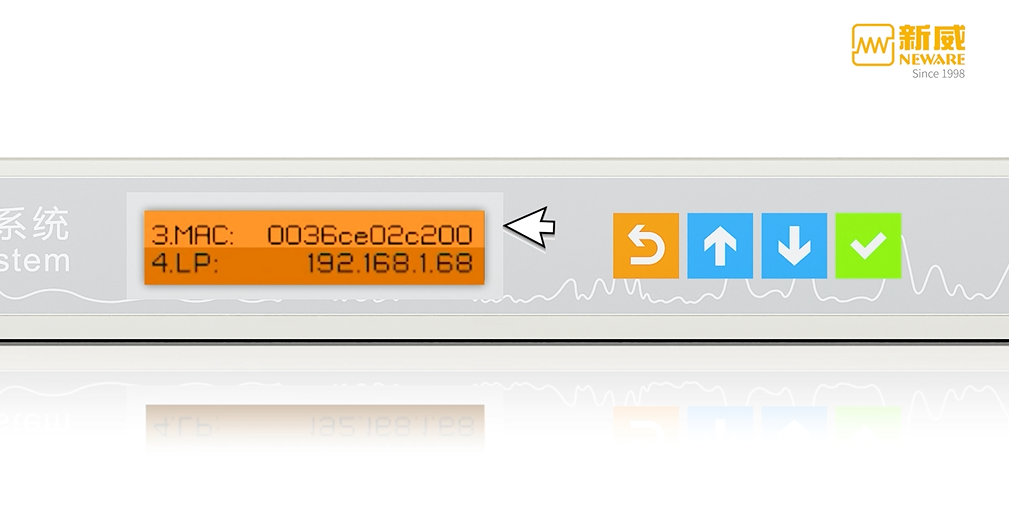
Scroll down to line 4 【LP】, line 6【GW】, and line 7【SP】.
Check all 3 IP addresses and ensure the first 3 digits are the same. For example, 192.168.1.xxx.
Remember this 3 digits for later use.
3. Ethernet setting
3.1 Set up Ethernet IP address
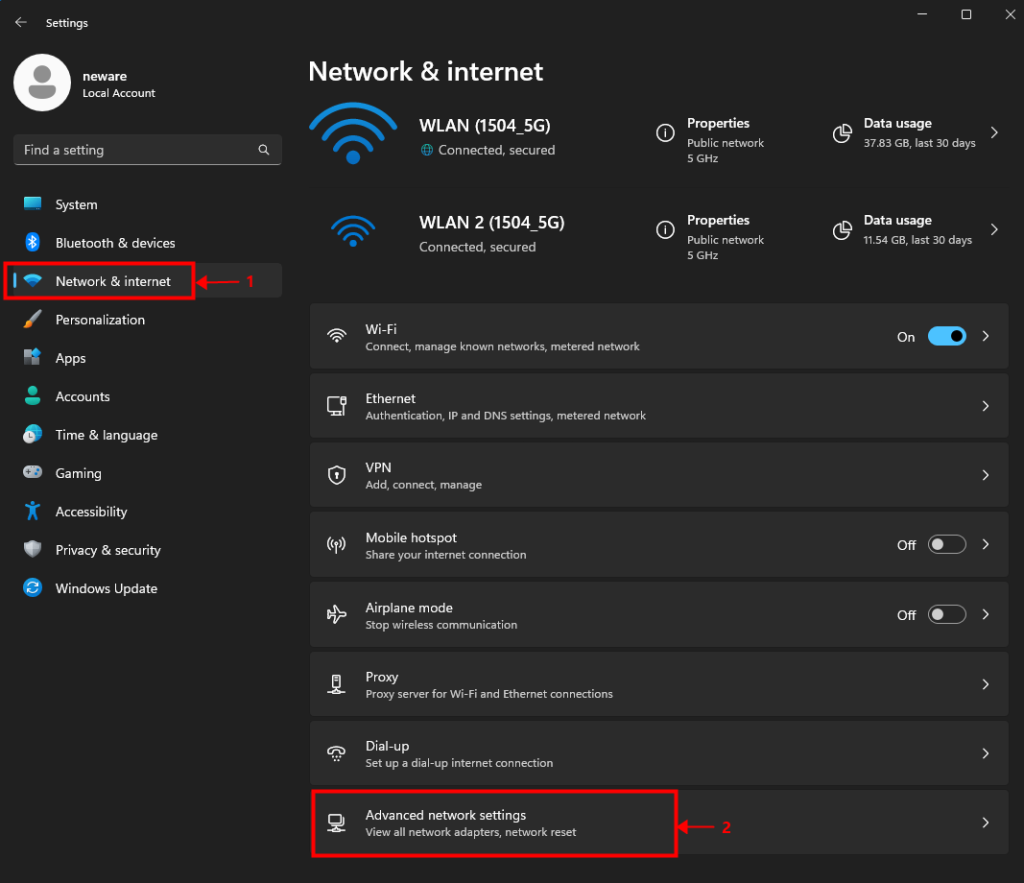
【Settings】 >【 Network & Internet】 >【 Advance network settings】
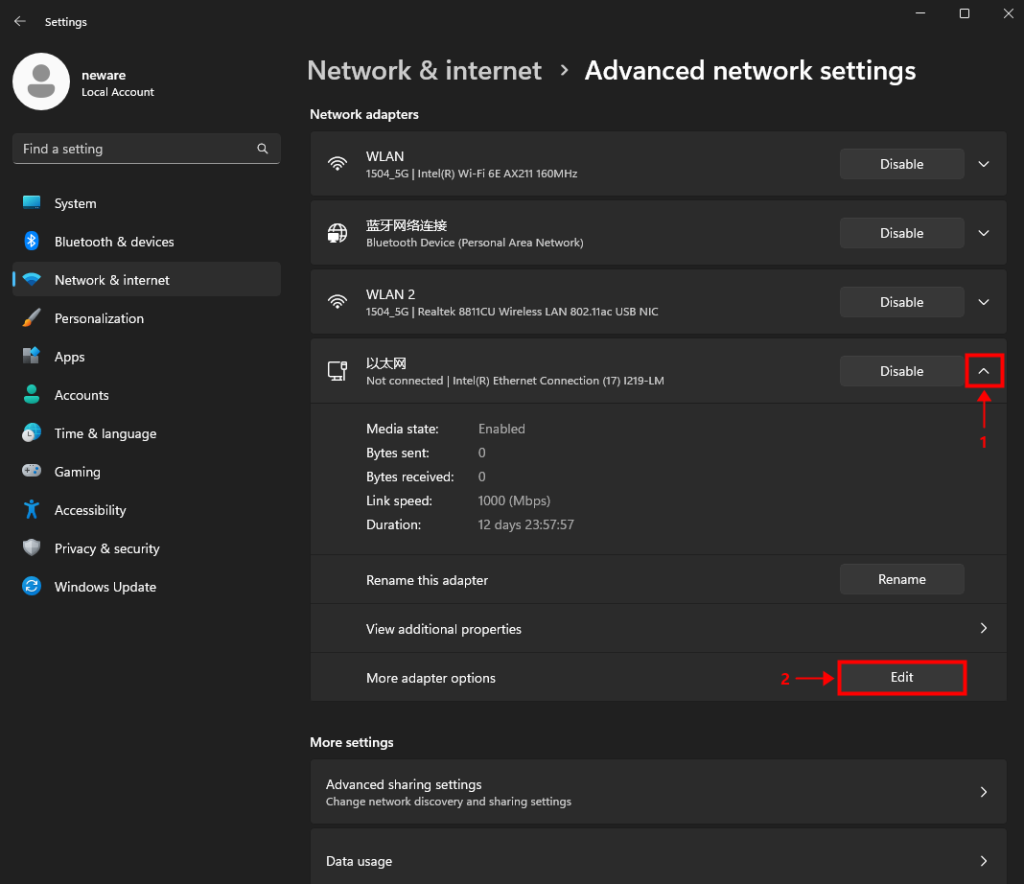
Find the ethernet block, expand hidden options, select 【more adapter options】.
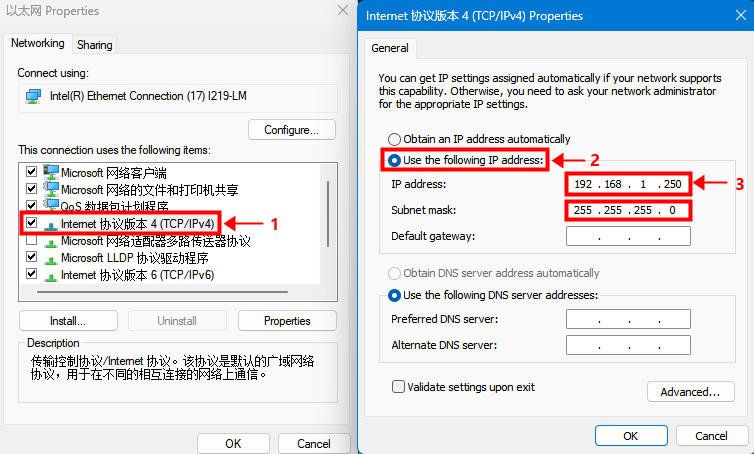
Double-click on the TCP/IPv4 setting.
Select the second option and type in the IP address manually.
The IP address is showing on the line 7 【SP】on the controller unit.
Or, if you still remember the 3 digits from previous steps, type in those 3 digits, and the last digit would always be 250.
4. Software download and installation
Download link: BTS 8.0.1 (64 bit)
Other software options: https://www.newarebts.net/download/
5. Software set up
5.1 Log in
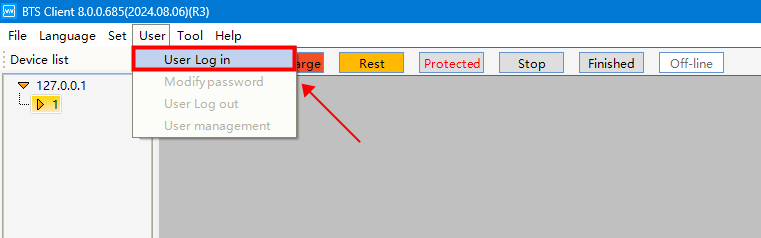
【User】 >【 User Log in】
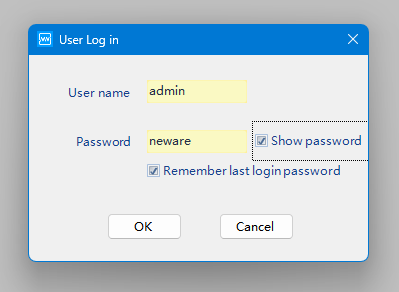
User name: admin
Password: neware
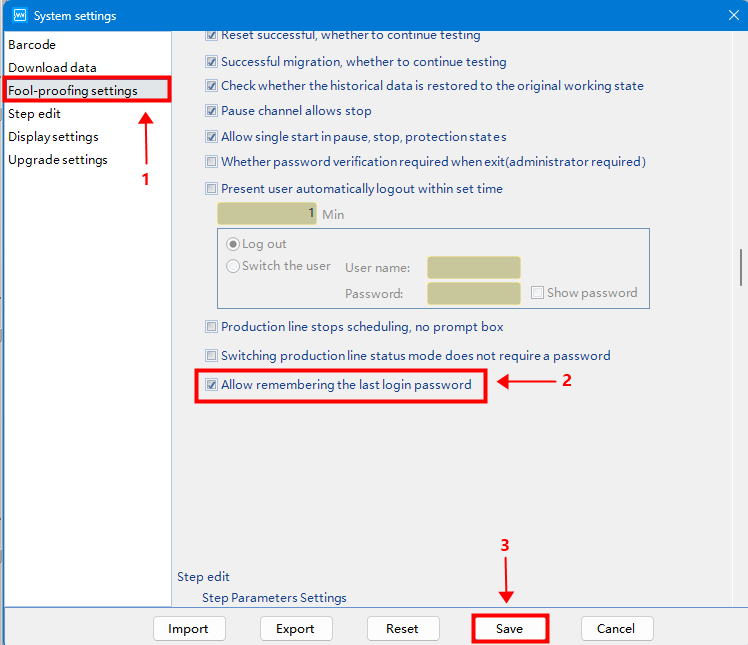
Recommended steps (not mandatory).
Allow remembering the password to avoid entering it each time you adjust the settings.
5.2 Reset mapping
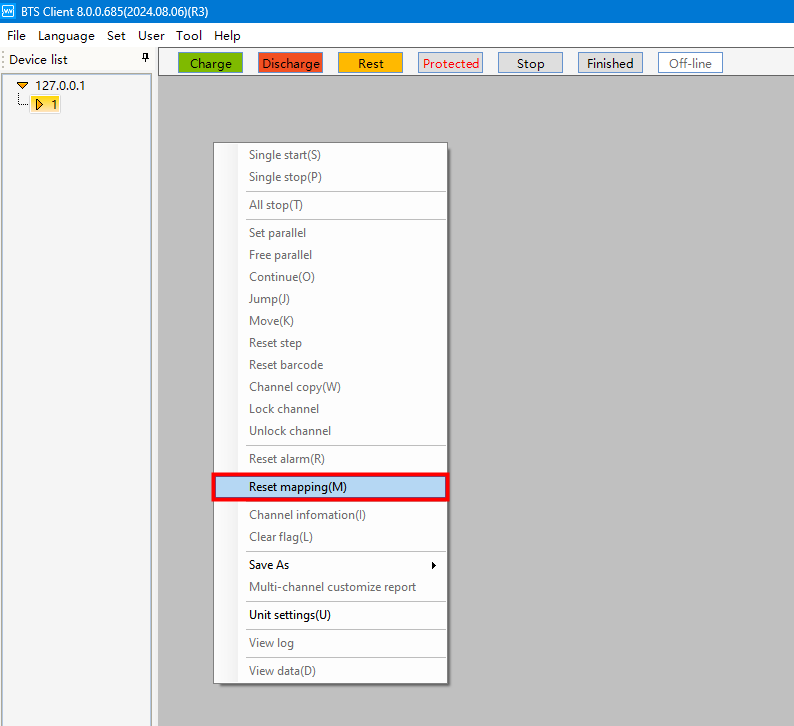
Right-click and select 【reset mapping】.
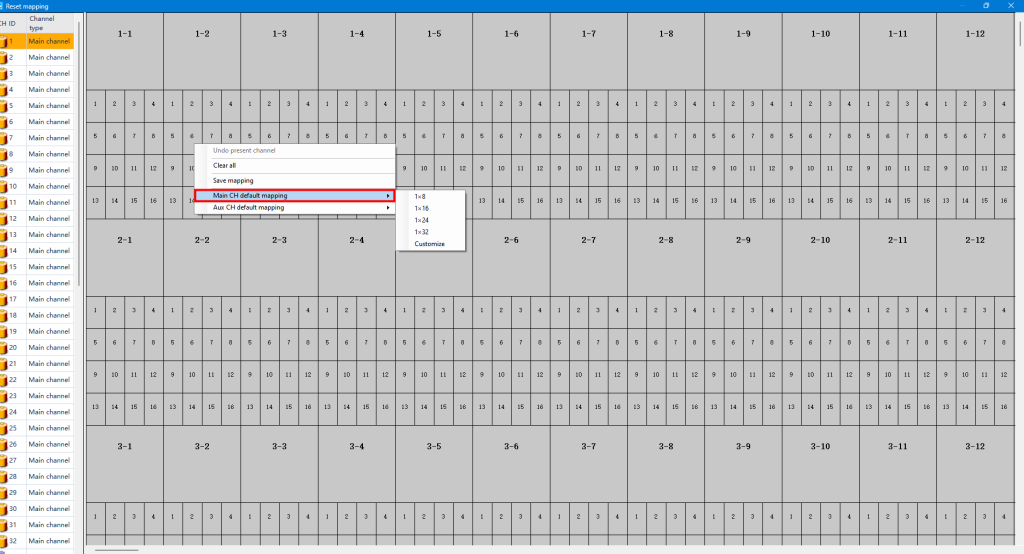
Right-click and select 【main CH default mapping】. Choose your preferred layout.
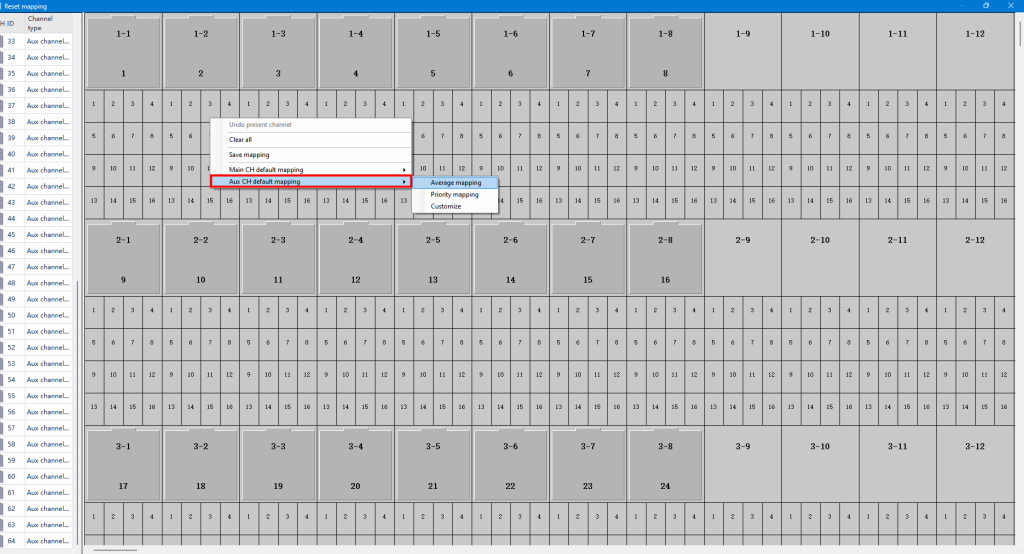
If you have auxiliary channels (for extra voltage and temperature measurements), drag them under the related main channels, or use average mapping to assign them to the main channels.

Save mapping before you close down this window.
5.3 Adjust the display to fit your screen and application
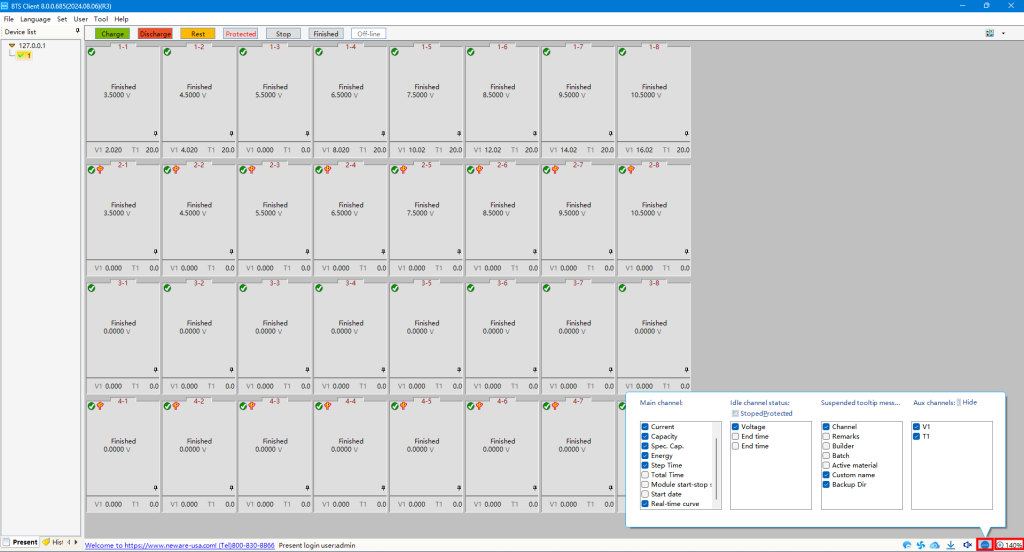
Adjust the display settings at the bottom of the page to fit your preferences.
5.4 Start a test

Choose the channel(s) for testing, right-click, and select 【Single start(s)】.