
This calibration guide utilizes Neware’s auto calibration toolkit (CJ-Cali-4’S-5V12A-8). For optimal results, we recommend using the Keysight 34461A 6.5 Digit multimeter.
1. Hardware connection
1.1 Power cord connection.
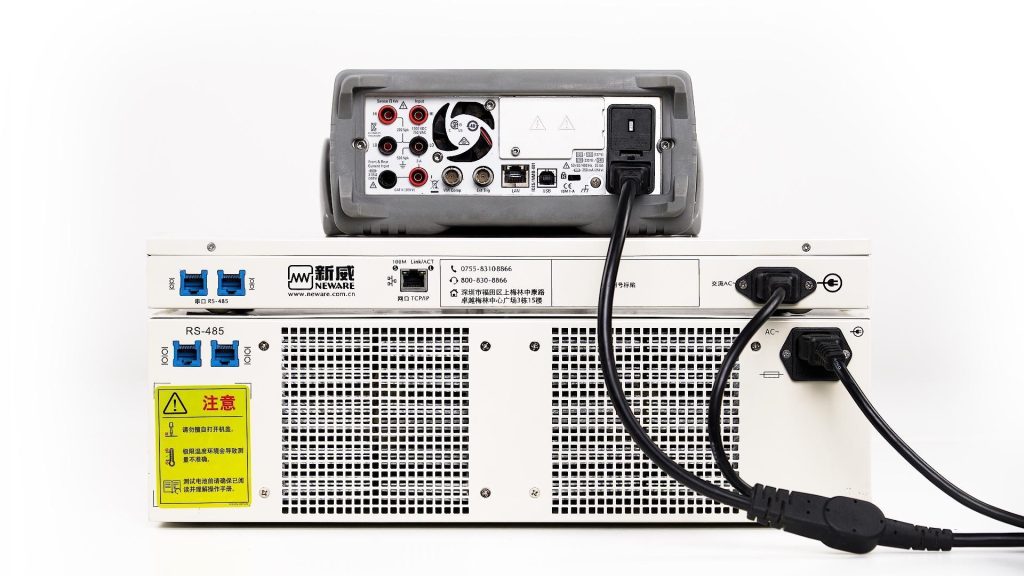
Attach the power cords to the multimeter, calibration tools, and testing equipment.
1.2 Ethernet cable connection
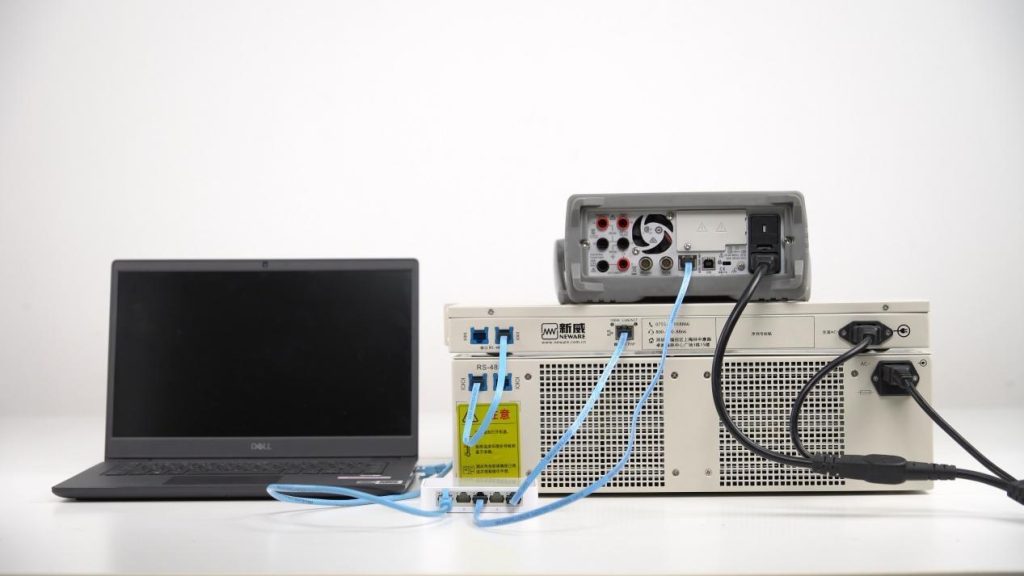
Connect the RS-485 ports between the auto-calibration toolkit and the 5V12A tester.
Connect the Keysight 34461A multimeter and calibration toolkit to an ethernet switch.
Connect the ethernet switch to the computer.
1.3 Calibration toolkit connection
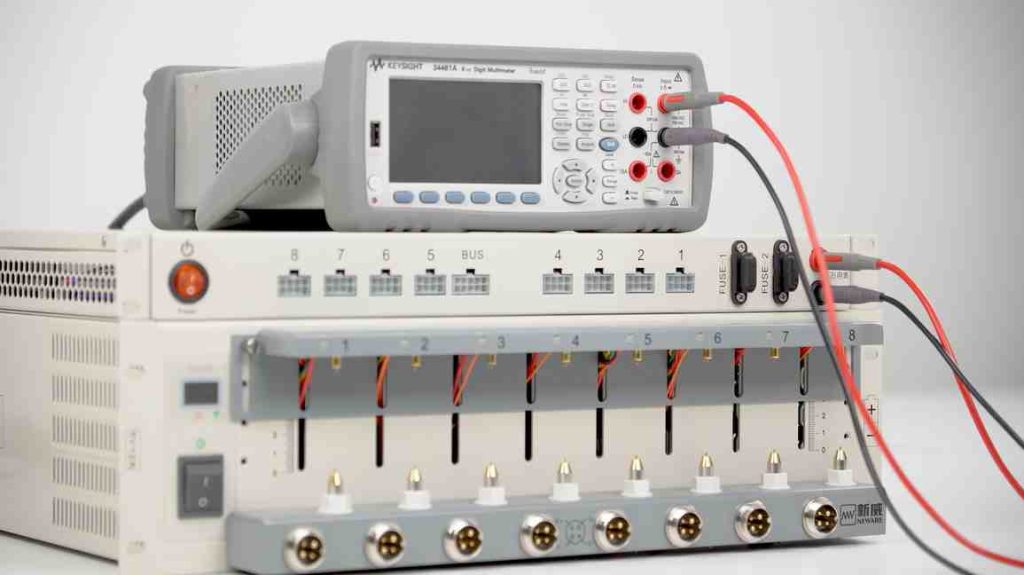
Insert the cable pens into both the multimeter and calibration toolkit.
Match the positive (red) and negative (black) poles.

Plug in the channel cables, ensuring that you match the corresponding channel ID numbers.
1.4 Turn on all devices and check the IP address.

Turn the devices on in this order: tester – calibration toolkit – multimeter.
On the multimeter, click the buttons in below orders to check the IP address:
【Shift】 – 【 Display】 – 【I/O】 – 【Lan Setting】
2. Computer configuration setting
2.1 Turn off safety protection and firewall
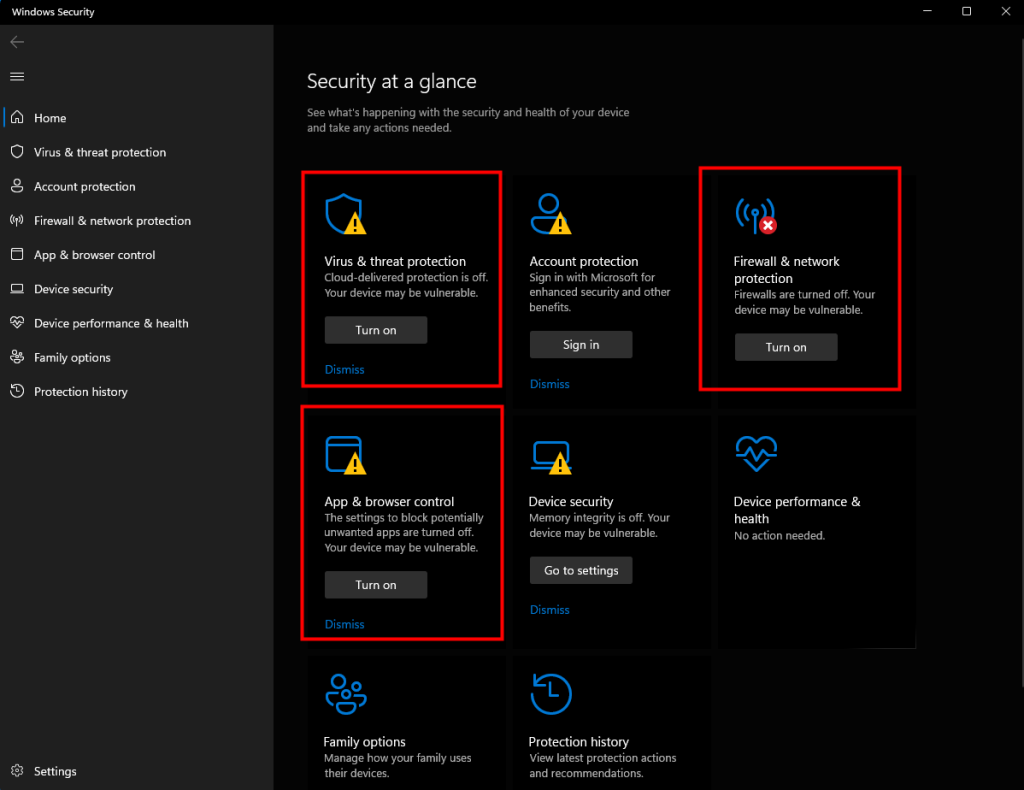
Locate 【Windows Security】 in the settings menu.
Disable 【Virus & threat protection】, 【Firewall & network protection】, and 【App & browser control】.
2.2 IP setting
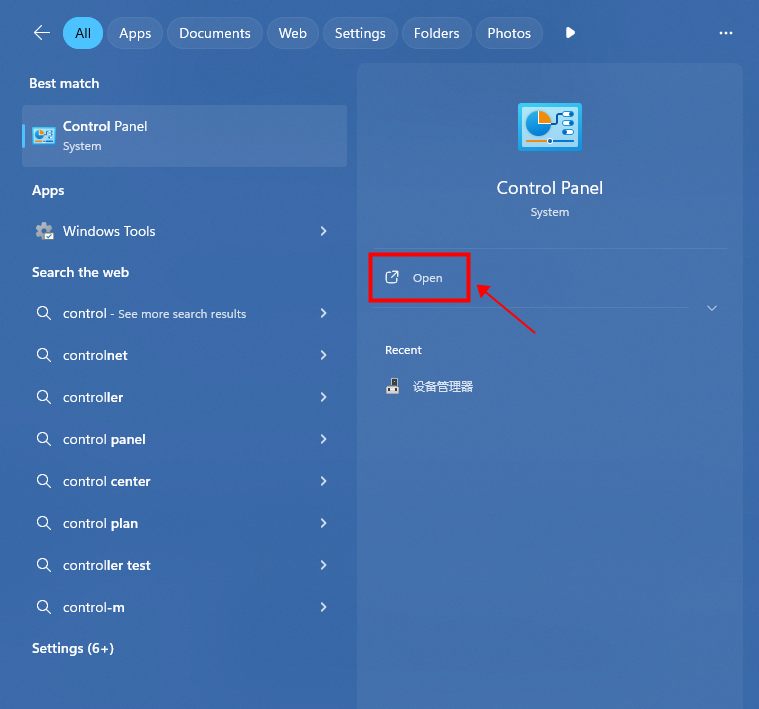
Search for ‘Control Panel’ in the settings and click to open it.
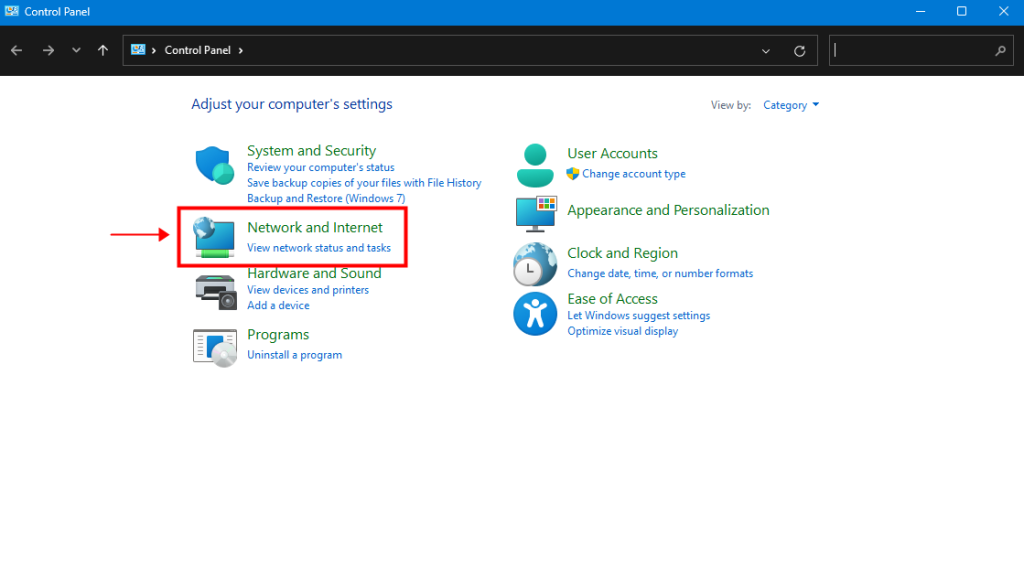
Click on “Network and Internet”.
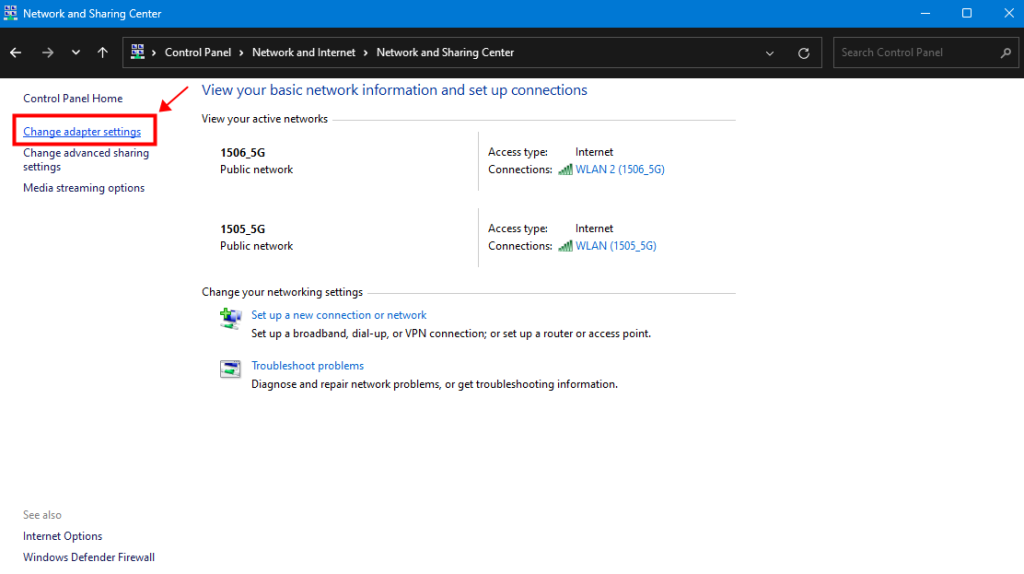
Select “Change adapter settings”.
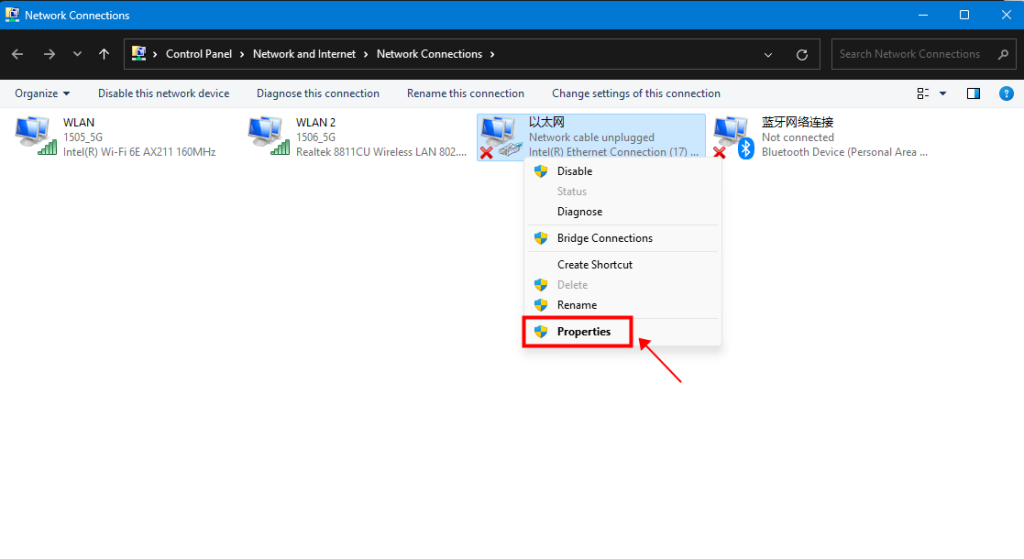
Right-click on the ethernet, select “Properties”.

Select “TCP/IPv4”, and click on “Properties”.
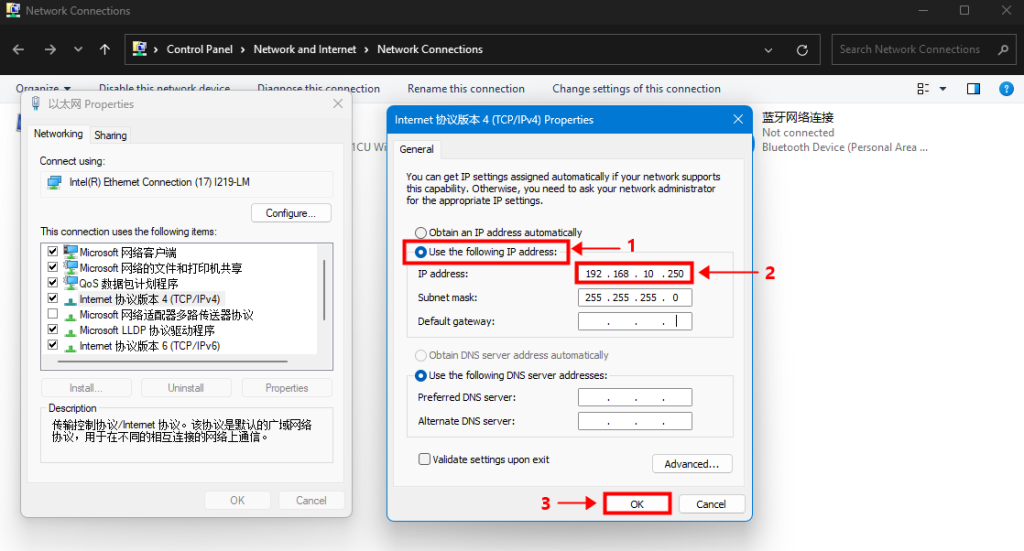
Choose the second option and manually enter the IP address.
The first three segments should match the gateway of both the multimeter and the calibration toolkit, for example, ‘192.168.10’.
The final segment should be ’250‘.
3. Calibration in BTS 8.0 software
3.1 Open BTS 8.0 and log in
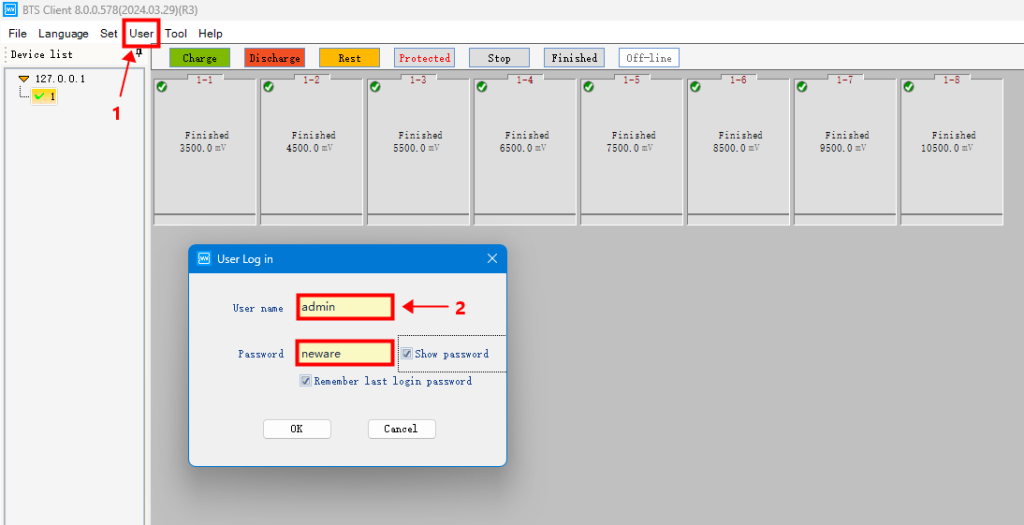
Select 【User】 – 【User Login】.
User name: admin
Password: neware
3.2 Calibration Interface
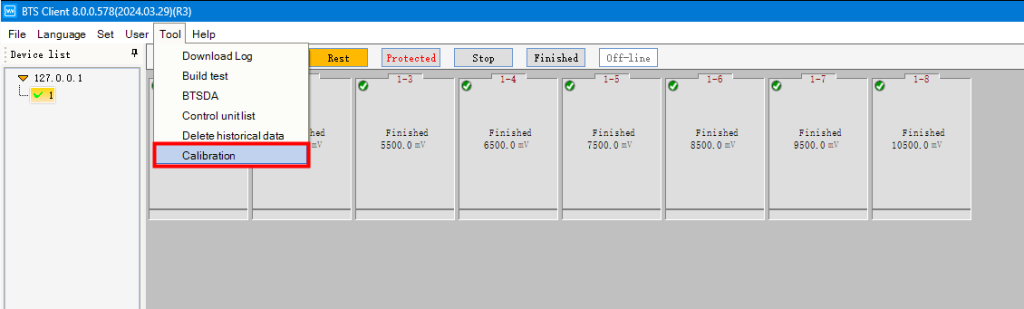
Find the 【Calibration】 button under 【Tool】.
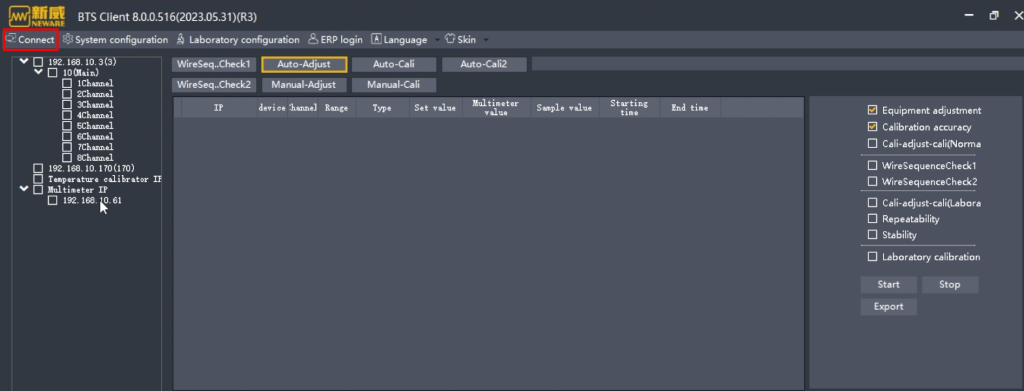
In the calibration interface, click 【Connect】.
The list of testers and multimeters will appear in the left menu.
If the multimeter does not appear right away, try clicking 【Connect】 again.
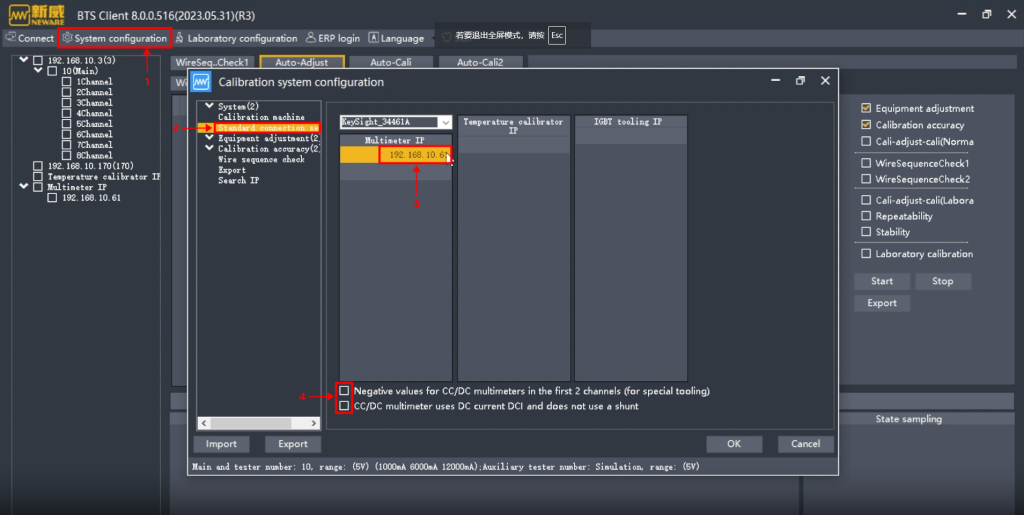
Select 【System configuration】 and then 【Standard configuration】.
Here, you can check the IP address of the multimeter.
Ensure that both brackets are left deselected before clicking ‘OK.’
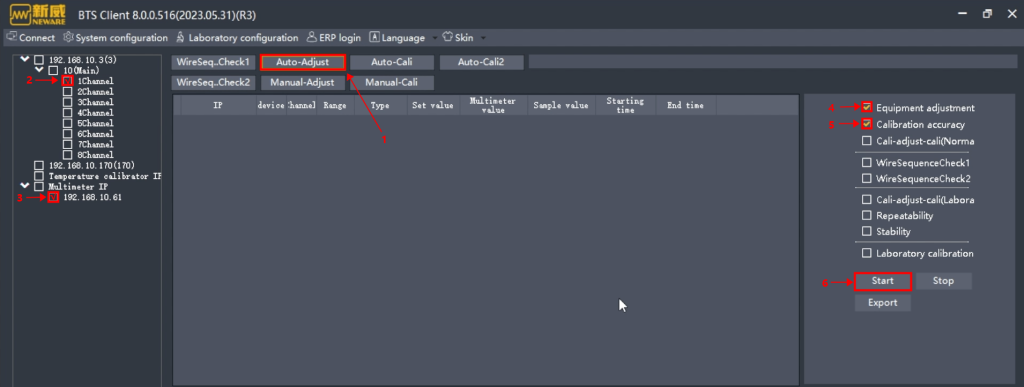
Click on 【Auto-Adjust】 to begin the automatic calibration process.
Choose the channel you wish to calibrate, and we recommend calibrating the channels in sequential order.
Keep the multimeter selected.
Then, select 【Equipment adjustment】 and 【Calibration accuracy】.
Click 【Start】 to proceed.
Repeat these steps for all channels to complete the calibration.